
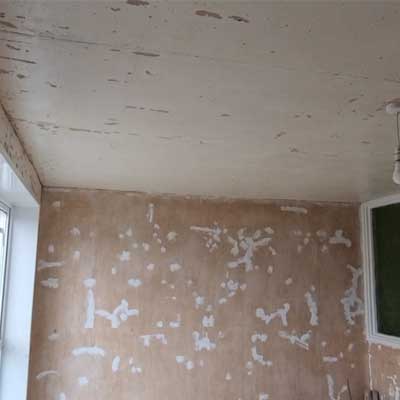
There’s nothing quite like plastering a room to renew the years of deterioration some houses go through. With this job, the house was situated next to a main road, and even though the walls were solid, there were a lot of cracks to deal with.
Cracks in walls and ceilings are something many homeowners in Grimsby and the wider North East Lincolnshire area encounter, especially in older homes where age, settling, or even seasonal moisture shifts can take their toll. Before any replastering work can begin, it’s essential to assess and treat these cracks properly to ensure a lasting, high-quality finish.
At Grimsby Plastering Services, we understand how unsettling it can be to see cracks forming in your home. This article walks you through what to do, and why it matters before moving forward with any plastering work.
Why Cracks Happen
Cracks can appear for a variety of reasons:
-
Settling foundations in older properties
-
Thermal movement due to temperature and humidity changes
-
Water damage from roof leaks or plumbing issues
-
Poor workmanship from previous repairs or DIY attempts
The first step is to determine whether the crack is superficial or a sign of a deeper structural issue. For major concerns—such as wide, stepped cracks or cracks above doors and windows—it may be wise to consult a builder or structural engineer before proceeding with plastering.
Step 1: Identify the Type of Crack
Here’s a general guide:
| Crack Width | Likely Cause | Action Required |
|---|---|---|
| Hairline | Shrinkage, drying, minor settling | Fill and tape before plastering |
| 1-5mm | Movement, mild structural shift | Rake out, reinforce, then skim |
| Over 5mm | Significant movement or damage | Structural investigation may be needed |
We always assess cracks during our site visits to make sure the root cause is addressed before we get to work.
Step 2: Prepare the Surface
Once it’s clear that the crack isn’t a sign of deeper structural issues, the next step is preparation.
-
Rake out the crack – This involves widening it slightly to allow filler to bond properly.
-
Clean the area – Dust, grease, or old paint can prevent materials from adhering well.
-
Apply filler – For smaller cracks, a flexible filler is used; deeper cracks may need a bonding compound.
-
Mesh tape for reinforcement – To stop the crack from reappearing, especially over joins in plasterboard or where movement is likely.
-
Allow to fully dry – Rushing this stage can lead to bubbling or delamination in the new plaster.
Step 3: Replastering the Right Way
Once cracks are treated and surfaces are sound, replastering can begin. Depending on the condition of the room, this might involve:
-
Skim coating (a fresh top coat over existing plaster)
-
Full reboarding and plastering (in cases of extensive damage or old lath and plaster)
-
Patch repair (where only sections are affected)
We work with care to ensure your walls are flat, durable, and beautifully finished.
Why Professional Help Matters
While crack repair and plastering can seem like straightforward tasks, doing them incorrectly can lead to further issues down the line—like recurring cracks, poor adhesion, or uneven finishes.
At Grimsby Plastering Services, we’ve helped countless homeowners in Grimsby, Cleethorpes, and surrounding areas restore their rooms to like-new condition. We use time-tested techniques, high-quality materials, and offer honest advice to help you make informed decisions about your home.
Need Advice or a Quote?
If you’re unsure about cracks in your home or planning a room refresh, we’re here to help. Get in touch today to book a no-obligation site visit. We’ll assess your needs, explain the options, and provide a clear, competitive quote.
Drop me a message on WhatsApp: 07767037365
Serving Grimsby, Cleethorpes, Waltham, Scartho, and the wider N.E. Lincolnshire area.
